Very good like always 😉
Setup OGProxy for use in NodeBB
-
For anyone who has been following the below thread, this is for you in terms of installation on your own forum. As with all good demos and POC’s, this site runs the
OGProxyand you’ll see it working as you trawl through this post.https://sudonix.org/topic/495/ogproxy-a-replacement-for-iframely
First things first
There’s some things we need to cover first before we start to deploy any code. Remember how in the thread above, I mentioned that
OGProxyis in fact a server and client, and not a plugin. I could have made the client side a plugin, but to me, there’s little point given the length of code required to actually execute thepreviewLinks()function.That said, there are actually three distinct elements that make up the
OGProxyframework. These are- A
nodeJSbased server that is responsible for working in the background, and makes use of the existingopen-graph-scraperpackage you’ll find in NPM - no point in reinventing the wheel here")
https://www.npmjs.com/package/open-graph-scraper
-
A
proxy serveris required, and needs to run in a subdomain of your parent. For example, if your domain issomething.comthen you need to setup an A record at your DNS provider forproxyand have it point to the same IP address where your web server sits that hosts NodeBB. You’ll then need to create annginxconfig for this new site (see later in this walkthrough), and access that ashttps://proxy.something.com(the https is an expected standard these days, so don’t be surprised by this). -
Client side execution of the
previewLinks()function. NodeBB comes with it’s own custom JS panel, and we’ll be making good use of that. -
Some custom CSS
If you are curious as to what each line of the
node serveris doing, I have provided a detailed explanation here
How does the OGProxy work?The OGProxy sets up a server using the NodeJS Express framework to handle a route for fetching Open Graph data from a given URL. Let’s go through the code and understand its functionality:
-
Importing Required Modules:
express: The Express framework for creating the server.open-graph-scraper: A module for scraping Open Graph data from a web page.cors: A middleware for enabling Cross-Origin Resource Sharing.url: The built-in Node.js module for working with URLs.memory-cache: A simple in-memory cache for storing and retrieving data.axios: A popular HTTP client for making requests.meta-parser: A module for parsing meta properties from HTML.cheerio: A library for parsing and manipulating HTML.path: The built-in Node.js module for working with file paths.
-
Creating an Express App and Configuring the Server:
express()creates an instance of the Express application.portspecifies the port number on which the server will listen.app.use(cors({ origin: 'https://sudonix.org' }))enables Cross-Origin Resource Sharing, allowing requests from the specified origin.
-
Handling the Route:
app.get('/ogproxy', async (req, res) => {...})defines a route for handling GET requests to ‘/ogproxy’.- The callback function is an asynchronous function that receives the request (
req) and response (res) objects.
-
Request Validation:
let { url } = req.query;extracts the ‘url’ query parameter from the request.const requestApiKey = req.headers['x-api-key'];retrieves the value of the ‘x-api-key’ header from the request.- If the request API key doesn’t match the expected
apiKey, a 401 Unauthorized response is sent. - If the ‘url’ parameter is missing or doesn’t start with ‘http’, the URL is constructed using the request’s protocol and host.
-
Caching:
- The code checks if the requested URL is already cached in the
memory-cache. If so, the cached result is returned as a JSON response. - If the URL is not cached, the code proceeds to scrape the Open Graph data.
- The code checks if the requested URL is already cached in the
-
Scraping Open Graph Data:
- The
ogsmodule is used to scrape Open Graph data from the provided URL asynchronously. - If the scraping is successful and the required data is present, the code proceeds to fetch additional data.
- The
-
Fetching Additional Data:
- The code uses
axiosto fetch the content of the website associated with the URL. - The fetched HTML content is passed to
cheeriofor parsing and manipulation. meta-parseris used to extract meta properties from the HTML content.- The extracted meta properties and other relevant data are stored in the
metadataobject.
- The code uses
-
Handling Favicon:
- If a favicon URL is present in the metadata, the code resolves the full URL based on the provided URL.
- The code uses
axiosto fetch the favicon image as an array buffer. - The favicon data is then converted to a base64 string and appended with the appropriate data URL prefix.
- If an error occurs while fetching the favicon, an error message is logged to the console.
-
Modifying and Caching the Results:
- The
metaPropertiesandfaviconUrlare added to the results obtained from the Open Graph scraping. - The URL and its corresponding results are cached using the
memory-cachemodule. - The results are sent as a
JSONresponse.
- The
-
Error Handling:
- If any error occurs during the scraping or processing of data, a 500 Internal Server Error response is sent.
-
Starting the Server:
app.listen(port, () => {...})starts the server and listens on the specified port.- A log message is printed to the console indicating the server is running.
Overall, this code sets up an Express server that acts as a proxy for fetching Open Graph data from a given URL. It includes caching to improve performance and handles additional data retrieval such as website content, meta properties, and favicon images. The server responds to requests with the scraped Open Graph data in a JSON format.
1. Build the server
I’ve simplified this process so that you only need to perform the basic steps to get up and running. At this point. I’m, going to assume you have the directory structure in place already for your subdomain - now navigate to the root path, for example
cd /home/sudonix.org/domains/proxy.sudonix.orgWe are going to be taking the files from my Git Repository located here
https://github.com/phenomlab/ogproxy
Once you are in the right place, issue
git clone https://github.com/phenomlab/ogproxyYou should see something like this being returned
Cloning into 'ogproxy'...
remote: Enumerating objects: 28, done.
remote: Counting objects: 100% (28/28), done.
remote: Compressing objects: 100% (26/26), done.
remote: Total 28 (delta 9), reused 0 (delta 0), pack-reused 0
Unpacking objects: 100% (28/28), 234.21 KiB | 4.78 MiB/s, done.
Now move into the
ogproxydirectorycd ogproxy/Once you are there, issue
npm installThis will install the required libraries for the server to work. There may be some messages generated that refer to legacy or outdated libraries - for the time being, this is ok, and you can ignore it
npm WARN deprecated har-validator@5.1.5: this library is no longer supported
npm WARN deprecated querystring@0.2.0: The querystring API is considered Legacy. new code should use the URLSearchParams API instead.
npm WARN deprecated uuid@3.4.0: Please upgrade  to version 7 or higher.  Older versions may use Math.random() in certain circumstances, which is known to be problematic.  See https://v8.dev/blog/math-random for details.
npm WARN deprecated request@2.88.2: request has been deprecated, see https://github.com/request/request/issues/3142

added 148 packages, and audited 149 packages in 2s
At this point, you could feasibly run
node serverWhich will respond with a message telling you that the service is listening on port 2000 (which you can change if you need to). However, for the time being, leave it - if you’ve already executed this command, kill it
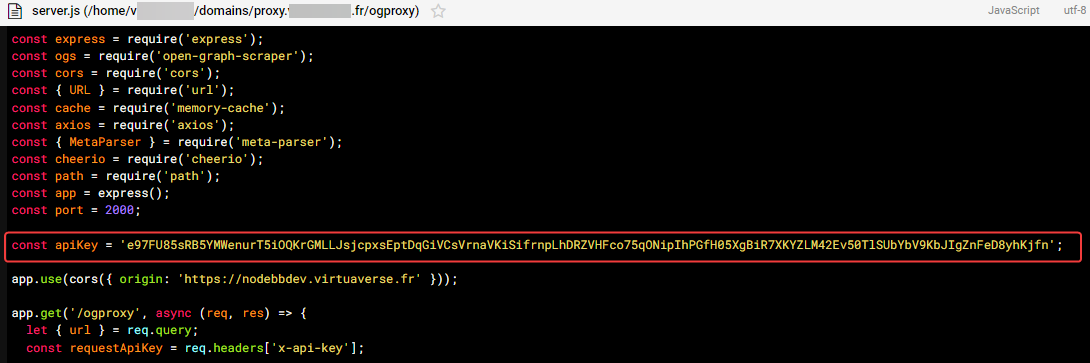
Edit the server.js file
Locate
server.jsin the same directory structure, and look for these two linesconst apiKey = 'YOUR_API_KEY_HERE'; app.use(cors({ origin: 'FULL_FQDN_OF_YOUR_ORIGIN_HERE' }));For the first part, you’ll need to generate an API key. You can do that here
https://generate-random.org/api-key-generator?count=1&length=64&type=mixed-numbers&prefix=
64bit is certainly enough to keep the server secured and is the recommendation. Keys of other lengths seem to be truncated in transit.
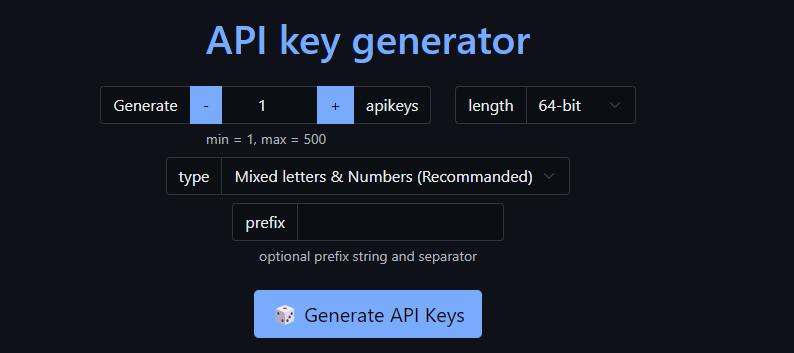
You should land up with a key like the below after you click “Generate API Keys”
9XWxMB8y8IMv3NXeg4yA58xvfC4Js9AgaqyH28IGfJStcG6kEzNl5QD26j09bV5MSave that key in the space where you see
YOUR_API_KEY_HEREso it looks likeconst apiKey = '9XWxMB8y8IMv3NXeg4yA58xvfC4Js9AgaqyH28IGfJStcG6kEzNl5QD26j09bV5M';Now in the origin section, this is the full FQDN (Fully Qualified Domain Name) of your site. For example, if you use https://forum.example.com as your forum’s URL, then you use this etc.
app.use(cors({ origin: 'https://forum.example.com' }));Save the server script, and close the editor. Don’t be tempted to touch anything else
Create a service so that your Proxy runs unattended
Let’s create a file called
/etc/systemd/system/ogproxy.serviceInside this new file, paste the below code
[Unit]
Description=OGProxy Server
After=network.target

[Service]
ExecStart=/usr/bin/node /path/to/your/subdomain/ogproxy/server.js
WorkingDirectory=/path/to/your/subdomain/ogproxy
Restart=always
RestartSec=3

[Install]
WantedBy=multi-user.target
Obviously, you’ll need to replace
/path/to/your/subdomain/with the actual path you are using.Save the file and exit the editor.
Now issue
sudo systemctl start ogproxyAnd
sudo systemctl enable ogproxyIf evrything went well, then your new
ogproxyservice should be running. You can test this withsystemctl status ogproxyYou should receive output similar to the below
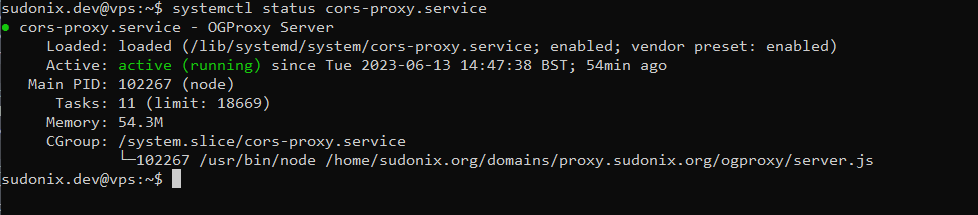
if you see the above (with your settings, and not mine), then the service is running.
2. Configure the NGINX reverse proxy
Locate your
nginx.conffile that relates to the subdomain you created in step 1. Edit that fileYour config should be made to look like the below
server {
	server_name [YOUR PROXY URL];
	listen [IP_ADDRESS];
	root /home/sudonix.org/domains/proxy.sudonix.org/ogproxy;
	index index.php index.htm index.html;
  location / {
    proxy_set_header Access-Control-Allow-Origin *;
    proxy_set_header Host $host;
    proxy_pass http://localhost:2000;
    proxy_redirect off;
    proxy_set_header Host $host;
    proxy_set_header X-Forwarded-For $proxy_add_x_forwarded_for;
    proxy_set_header X-Api-Key $http_x_api_key;
  }
  location /images {
    index index.php index.htm index.html;
    root /home/sudonix.org/domains/proxy.sudonix.org/ogproxy;
  }
	fastcgi_split_path_info "^(.+\.php)(/.+)$";
	listen [IP  ADDRESS]:443 ssl http2;
	ssl_certificate [PATH TO YOUR SSL CERT]
	ssl_certificate_key [PATH TO YOUR SSL KEY]
}
You obviously need to replace the values below with your own
[YOUR PROXY URL]
[IP_ADDRESS]
[PATH TO YOUR SSL CERT]
[PATH TO YOUR SSL KEY]
The above is a base config to get things working, and you may require more (for example access and error logging etc) - up to you.
Save the config, and issue
nginx -tif the config is ok with no errors, restart
nginx3. Client-side code
Now for the icing on the cake…
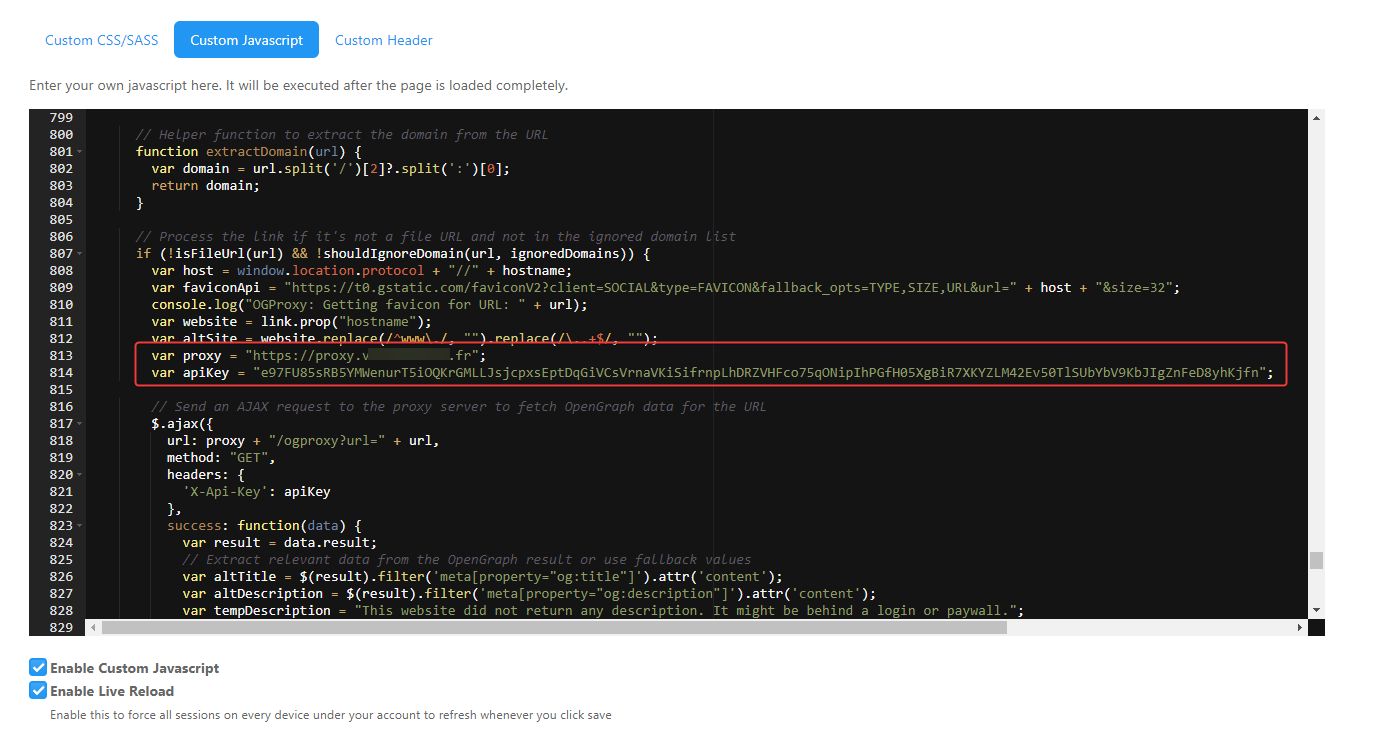
In NodeBB, navigate to
/admin/appearance/customise#custom-jsAdd all of the code you see in the below link at the end of your custom JS file
https://github.com/phenomlab/ogproxy/blob/main/function.js
Find the below two lines
        var proxy = "FULL_FQDN_OF_YOUR_OGPROXY_HERE";
        var apiKey = "YOUR_API_KEY_HERE";
So, for example, those two values should be something like this
        var proxy = "https://proxy.mydomain.com";
        var apiKey = "9XWxMB8y8IMv3NXeg4yA58xvfC4Js9AgaqyH28IGfJStcG6kEzNl5QD26j09bV5M";
Save the custom
js4. Restart the OGProxy service
sudo systemctl start ogproxyVerify
sudo systemctl status ogproxy4. Custom CSS
You’ll no doubt want some custom CSS for the classes that this code generates, so feel free to copy these classes in your custom CSS
.card img.card-favicon {
    max-width: 21px;
    max-height: 21px;
    margin-right: 10px;
}
h4.card-site-title {
    color: var(--bs-body-color);
    text-transform: capitalize;
}
.card.card-preview {
    margin: 20px 0 20px 0;
    width: 50%;
}
.card.card-wrapper {
    background: none;
    width: 450px;
}
[component="chat/message"] .card.card-preview {
    margin: 20px 0 20px 0;
    width: 30%;
}
.card.card-preview img:not(.card-favicon) {
    object-fit: cover;
    width: 100%;
    max-height: 15rem;
    border-top-left-radius: 0.375rem;
    border-top-right-radius: 0.375rem;
}
  .card.card-preview .img-fluid {
    max-width: 100% !important;
  }
  .card-preview p.card-text {
    font-size: 80%;
    color: var(--bs-body-color);
  }
  .card-preview h5.card-title {
    font-weight: 600;
    font-size: 120%;
    color: var(--bs-body-color);
}
Obviously, you’ll need to amend these to suit your site, and tastes
(and also note the use of variables, so you may need to substitute those where applicable)Take a deep breath… And test it!!
- A
-
after install seems to not work on my dev instance :

-
@DownPW did you follow all of the steps?
Any error messages displayed in the console?
-
yep all the steps
I have this when I attack subdomain https :

No error on nodebb console
nginx -t is good
-
maybe a firewall issue, i will test
-
@DownPW that’s normal. You’re getting that as a response because the server is secured and the headers must send the API key on request.
Without it, the server will refuse the connection. Can you confirm that the API key you generated exists in both the
server.jsfile and the customjsscript? -
@DownPW shouldn’t be. It’s using your own internet connection from the client.
-
hmmm OK.
Yep API key are in server.js file and custom js script -
@DownPW are you sure there is no error in the console?
-
nope no error
-
for custom js script, API key is just on ACP/customJS and not on
/home/XXXX/domains/proxy.XXXXXX.XXX/ogproxy/function.jsfile because not write in tuto -
@DownPW
function.jsis just the code that gets pasted into the custom JS console
-
-
@DownPW can you change the key so it’s 64bit? Just a theory I want to test. You’ll need to change it in the function and the server.js file.
-
Ok I will test now
-
Seem to be better. Just CSS problem I guess. I must see that
-
@DownPW yes, you can use the CSS I provided in the original post as a starting point.
I’m guessing that the server received a truncated API key because of the length so the authentication failed.
-
But see the second link, I don’t think it’s a CSS problem no ?
-
@DownPW yes, try the CSS provided in the article.
-
Already Done.
It seems i’m not be able to change text color after test. Idem with important
-
-
Block Domain
Solved Let's Build It -
-
-
-
-
-